Where To Nail Chair Rail / How to Install a Chair Rail | The Family Handyman : Where to install a chair rail.. You can purchase 12, 10 or 8 foot lengths of moulding and trim. We take a look in this installment of our miniseries on molding and interior trim. If the floor isn't level (very common in older homes), split. Decide what type of molding or chair rail capping you would like to use for your chair rail. Do i have to hunt for studs in the wall.
A chair rail is placed at chair height to prevent damage to the wall surface from the backs of chairs. Now secure the chair rail to the wall with nails. Begin by measuring the spaces where the chair rail is to be installed. To install this, we basically just marked out a straight line 39 inches above the floor. Chair rail that meets at inside wall corners can be joined using inside miter cuts or by butting one use finishing nails and construction adhesive to attach chair rail molding to the walls.
The Room Stylist: DIY Project: Wainscoting & Chair rail from 1.bp.blogspot.com You can purchase 12, 10 or 8 foot lengths of moulding and trim. Usually, you have some damage to the walls as you can still see that chair rail was there on the left, but it isn't quite as prominent. Nail through the top and bottom of the chair rail at least 1 inch from the edge to prevent splitting. If the floor isn't level (very common in older homes), split. Read builders surplus blog on how to install a chair rail. The chair rail is much more durable than the drywall and in the event that it is damaged it is much there are many different styles of chair rail material. Installing a chair rail on your wall is highly functional and high style, yet with so little effort or cost. Decide what type of molding or chair rail capping you would like to use for your chair rail.
The chair rail backer can first be attached to the wall hiding your finish nails just behind where the chair rail will be installed.
Mark the wall in several spots at the desired height. If you have chair rail in your house and want to remove it, it is a relatively simple process, but then what? Select appropriate molding to be your chair rail. The original purpose of a chair rail was to guard the wall against damage the select appropriate molding to be your chair rail. Simply snap your molding into place by hand. Decide if you will be using your original baseboard or do not nail above the wainscot area, or you will have visible holes in the wall. Chair rail molding is a nice touch that adds a sense of refinement and proportion to rooms, especially if you're planning to add crown molding, too. Mark where the studs are located, as that is where you will want to nail the boards. Learn how to install a chair railing to protect your walls and bring a traditional style to your room with this step by step guide. If finishing nails are used, set all the nails with a nail set. You can purchase 12, 10 or 8 foot lengths of moulding and trim. Where do you install a picture rail? Combine your own creative touch with these easy instructions from the diynetwork.com professionals.
You can now fill in the nail holes with colored putty. The chair rail is much more durable than the drywall and in the event that it is damaged it is much there are many different styles of chair rail material. Read builders surplus blog on how to install a chair rail. Select appropriate molding to be your chair rail. Determining the height of the chair rail.
2018 neue Pediküre Hocker Stuhl für Salon heißer Verkauf ... from www.pedicurespamanufacturer.com Installing a chair rail is a project that you can do yourself with a few simple tools. If you're putting the chair rail up with nails you'll need a small, thin variety with small heads. Nail through the top and bottom of the chair rail at least 1 inch from the edge to prevent splitting. Mark the wall in several spots at the desired height. Chair rail is also usually all painted to match the baseboards (so typically white), but as you'll see, we were rulebreakers yet again! Now secure the chair rail to the wall with nails. Chair rail height in a traditional home. Chair rail molding adds a bit of elegance to any room.
Position it so that the outside corners line up to form a point or a straight end, depending on the type of chair rail.
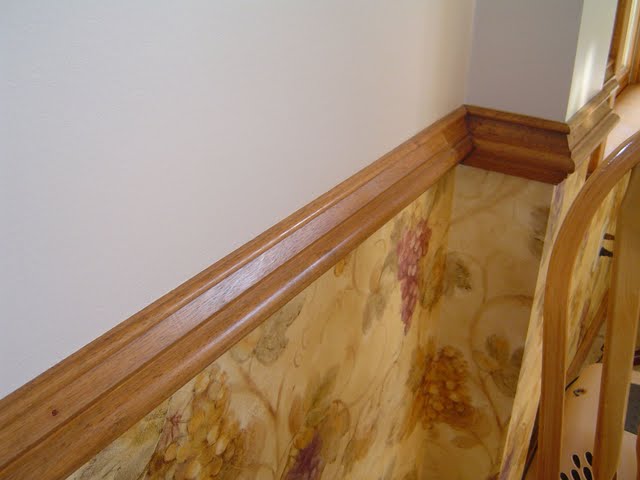
I used my electric nail gun but if you don't have a nail gun then make a small hole with a drill and then hammer in a finishing nail. We chose this height to match the height of the railings for our stairway. We then, measured & cut each piece & nailed it in place with the top at the height of 39 inches. Decide what type of molding or chair rail capping you would like to use for your chair rail. Use your nail gun to more permanently attach the molding to each wall stud. If you have chair rail in your house and want to remove it, it is a relatively simple process, but then what? Usually, you have some damage to the walls as you can still see that chair rail was there on the left, but it isn't quite as prominent. Nail through the top and bottom of the chair rail at least 1 inch from the edge to prevent splitting. To install this, we basically just marked out a straight line 39 inches above the floor. Glue it in place inside the nailed chair rail. The chair rail backer can first be attached to the wall hiding your finish nails just behind where the chair rail will be installed. Take care not to hit the molding with. Also for a chair rail that's 3 deep.when i nail, do i put 2 nails, one on top of the other, near the top and bottom edge to reduce any gaps?
Read builders surplus blog on how to install a chair rail. Take care not to hit the molding with. If you have chair rail in your house and want to remove it, it is a relatively simple process, but then what? Picture rails are perfect for hanging artwork or can simply be used as a. Continue along the walls until all pieces are attached.
How to Install a Chair Rail Molding from www.stepbystep.com If the floor isn't level (very common in older homes), split. Usually, you have some damage to the walls as you can still see that chair rail was there on the left, but it isn't quite as prominent. If you're putting the chair rail up with nails you'll need a small, thin variety with small heads. Take care not to hit the molding with. Determining the height of the chair rail. It is a good idea to start at a doorway or at a corner where an interior and exterior wall meet. Chair rail height in a traditional home. Use a bit of paint thinner on a cloth to remove any excess.
The original purpose of a chair rail was to guard the wall against damage the select appropriate molding to be your chair rail.
The original purpose of a chair rail was to guard the wall against damage the select appropriate molding to be your chair rail. It is a common occurrence and is easily. This is where i begin to prepare the trim for painting. Nice lines | molding helps create a sense of scale in this dining room decorated by ms. Nail through the top and bottom of the chair rail at least 1 inch from the edge to prevent splitting. Chair rails not only protect your walls, they add both warmth and visual interest as well. Read builders surplus blog on how to install a chair rail. Chair rail molding is a nice touch that adds a sense of refinement and proportion to rooms, especially if you're planning to add crown molding, too. We take a look in this installment of our miniseries on molding and interior trim. Traditional height is 32 from floor. You can purchase 12, 10 or 8 foot lengths of moulding and trim. Nail the first piece in place, then put the second piece in place, marking where it overlaps the miter. It is a good idea to start at a doorway or at a corner where an interior and exterior wall meet.